
HowTos
Table of Contents
HeadSet Setup (iOS)
DroneVR can be flexibly configured to work optimally with a wide variety of VR headsets. To configure your headset, select the “Headset” menu from DroneVR’s main settings menu. This guide applies to the iOS version of DroneVR.
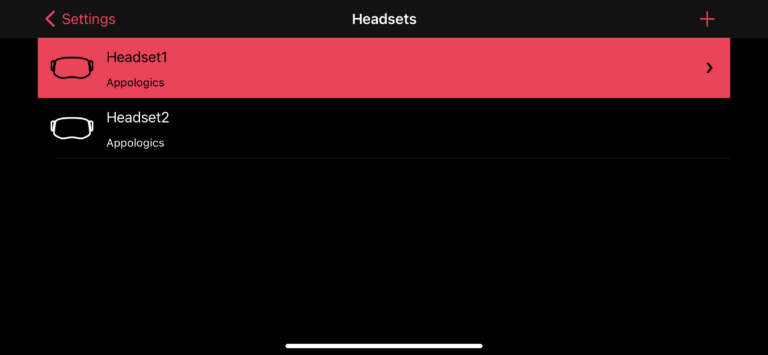
The entry screen to the headset setup shows the lists of headset profiles you have currently configured. If you own multiple headsets, you can create additional profiles so that you can quickly switch between them. The active headset profile is highlighted. To switch to another profile, just tap it once.
To add a new headset profile, tap the “+” button in top right corner. This will open a camera view where you can scan the QR code printed on your headset (if available) or manually create a new profile.
To delete a headset profile, just swipe to the left.
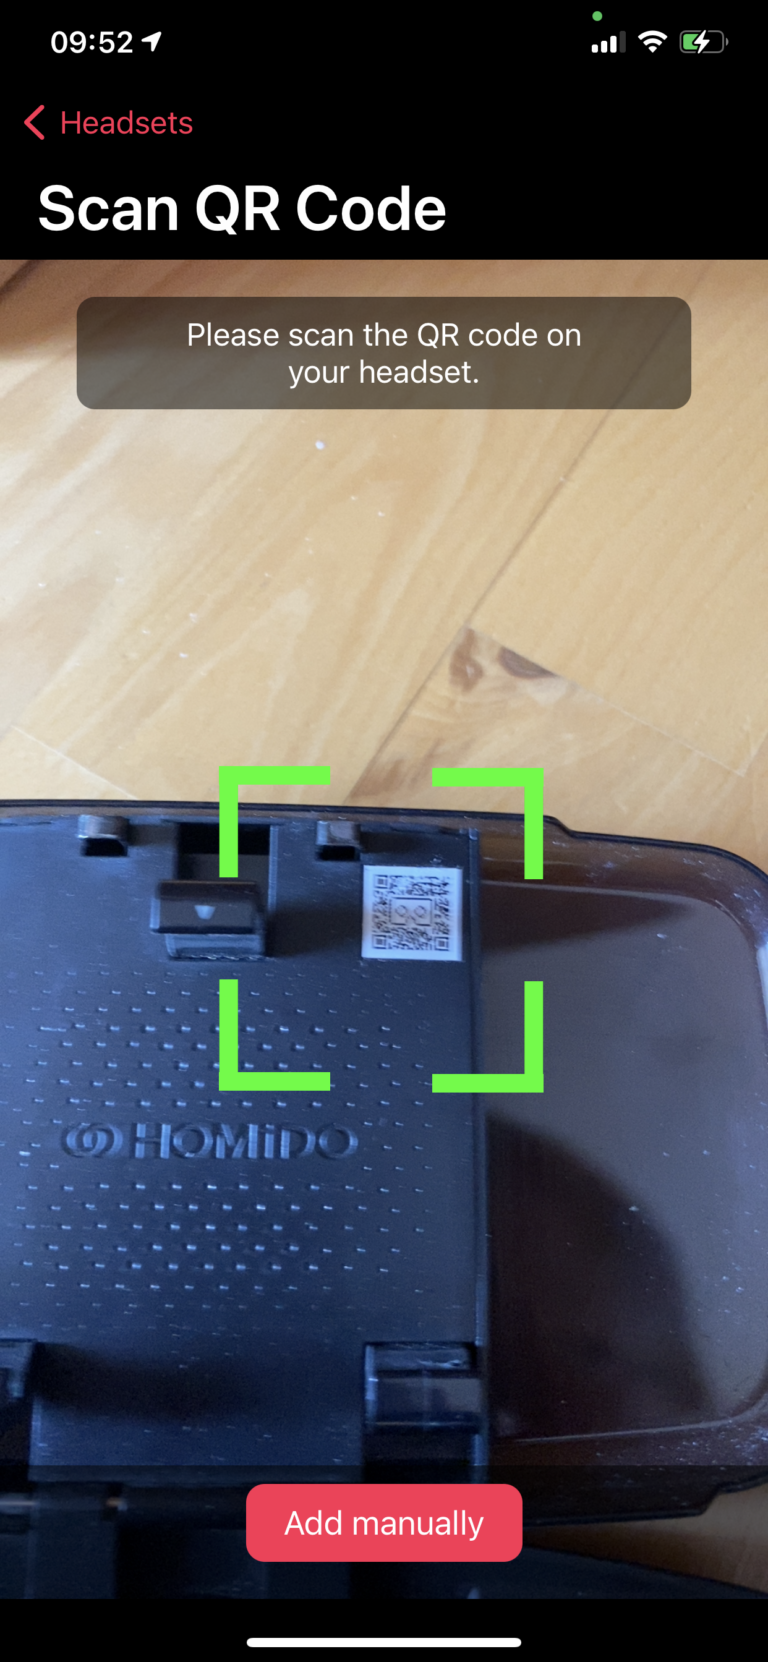
Tapping the “+” button will open a camera view to scan the QR code printed on some headsets. Scanning the QR code will automatically configure the headset profile with values defined by the headset vendor. You need to have an active Internet connection to use configuration via QR code.
Not all headsets support configuration via QR code. If you do not have a QR code for your headset, tap the “Add manually” button. This will create a new headset profile with default parameter. You can adjust them manually afterwards.
To manually configure your headset profile, tap the highlighted profile on the profile list. This will bring up the detailed headset configuration view as shown on the left.
The top bar shows the setting that is currently being configured (“Lens Distance” in the example picture). You can adjust its value in several ways:
- By dragging the slider or typing a value in the text field.
- By putting your phone into the headset and moving your head up and down. This way you can observe the effect of the change directly.
- If your drone is connected, you can also use the right stick on your RC to modify the setting while wearing the headset. Horizontal stick movement adjusts the value, while vertical stick movement switches between the different settings.
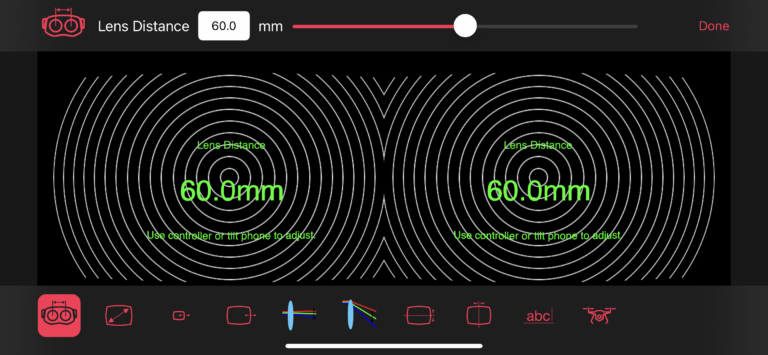
- Lens Distance: Adjusts the horizontal distance between left and right image of the stereo view. Usually this value is set according to the distance between your left and right eye.
- Scale: Scales the image up and down.
- Inner Distortion: Adjusts the level of lens distortion correction applied in the center of the image. Adjust it so that the inner squares appear undistorted when viewed through the headset lenses.
- Outer Distortion: Adjusts the level of lens distortion correction applied to the outer part of the image. Adjust it after setting up the inner distortion correction and so that the outer squares appear undistorted when viewed through the headset lenses.
- Inner chromatic aberration: Adjusts the difference in lens distortion correction applied to the red, green and blue color channels. Lenses of VR headsets typically cause different distortion in different parts of the color spectrum. This effect is called “chromatic aberration” and degrades the image quality significantly through “Rainbow effects” if not compensated. Adjust this parameter so that the inner squares appear completely white without red/green/blue shadows when viewed through the headset.
- Outer chromatic aberration: Adjusts the difference in lens distortion correction applied to the red, green and blue color channels in the outer part of the image. Adjust this parameter after setting up the inner distortion correction and so that the outer squares appear completely white without red/green/blue shadows when viewed through the headset.
- Vertical Offset: Allows to you to move both images up and down in case your phone is not centered vertically in the headset.
- Horizont Offset: Allows you to move both image left and right in case your phone is not centered horizontally in the headset.
- Headset Name: Allows you to change the name for the headset profile in the list.
- Test Headset: Plays a sample video so that you can test you current settings while while wearing your headset.
Using the Head-up Menu
For a seamless VR Flying experience it is very important that you are able to control and configure your drone while flying without taking off your headset. DroneVR has a special Head-up Menu that is seamlessly integrated with the Head-up Display. This menu can be used purely with your remote controller and without taking off your headset.
The remote controllers for the different DJI drones all come with a different set of buttons. Therefore DroneVR supports several alternative ways to open the Head-up Menu:
- By pressing the 5D button (Mavic Pro and 2)
- By pressing the FN button (Mavic Air/2, Spark)
- By pressing the right wheel (Phantom series)
- By short-pressing the RTH Button (Mavic Mini)
- Flipping the left stick on RC quickly left and right three times
If your controller has a 5D button, you can navigate through the menu by moving the 5D button up/down/left and right. If your controller does not have a 5D button, you can navigate through the menu with small movements of your controller’s right stick. In this case the drone will also move a little, so make sure it has some room to hover.
Below a brief description of the available submenus and menu options. Many menu options are similar to what you can configure in DroneVR’s main settings. Important: Your drone model might not support all functionality described below. Therefore some menu options can be hidden depending on the connected drone.
- Camera: Provides access to detailed camera settings for professional photographers such as focus, exposure, iso, aperture, shutter speed and white-balance.
- Photo: Allows you to choose between different photo shooting modes such as Single Images, HDR, Panoramas, Bursts and Series. You also can select photo aspect ratio and file formats such as RAW or JPEG.
- Video: Allows you to change the resolution, frame rate, compression standard and file format for video recording.
- Flight: Provides options to start automatic takeoff, landing and return-to-home. You can also between different flight modes and even start automated missions such as circulating around a hot spot.
- Airlink: Provides options to change bandwidth and channels for live video transmission. You can also change the live video resolution between HD and Full-HD on some drones.
- Storage: Provides options to switch the storage location for recordings between SD card and internal drone memory. It also shows the available space and you can format the SD card.
- Gimbal: Allows you to switch head tracking on/off for all three axis (if supported by your drone). You can also choose different levels of smoothing for head-tracking, re-center the camera on your current headset orientation and calibrate the gimbal.
- HUD: Allows you to change the type of Head-up-Display (Jet/Basic) and turn on/off the left and right picture-in-picture displays (mini map and phone camera). You can also select the content that is displayed in your main view (choose between Drone Video, Phone Video or Map).
Settings explained (iOS)
User Interface Settings
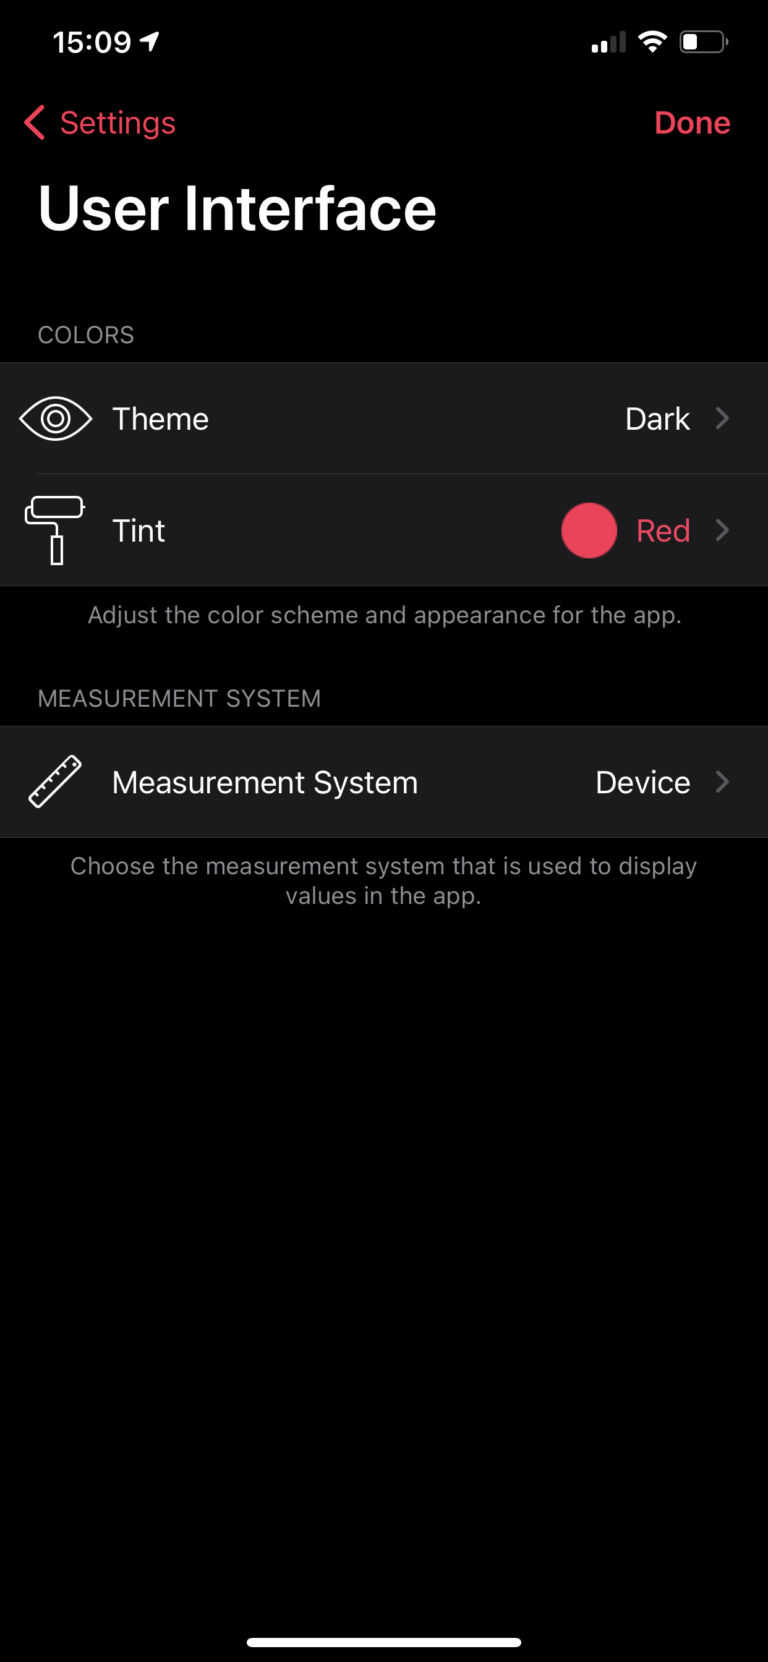
Theme
Allows you to switch between dark and light color theme for the app. Selecting “device” uses the global device settings to select the color scheme.
Tint
Allows you to select between different color the app uses for highlights and buttons.
Measurement System
Metric measurement system displays distance shown in the app and headed display in meters, while imperial measurement system displays them in miles or inches. The option device just uses the global device settings.
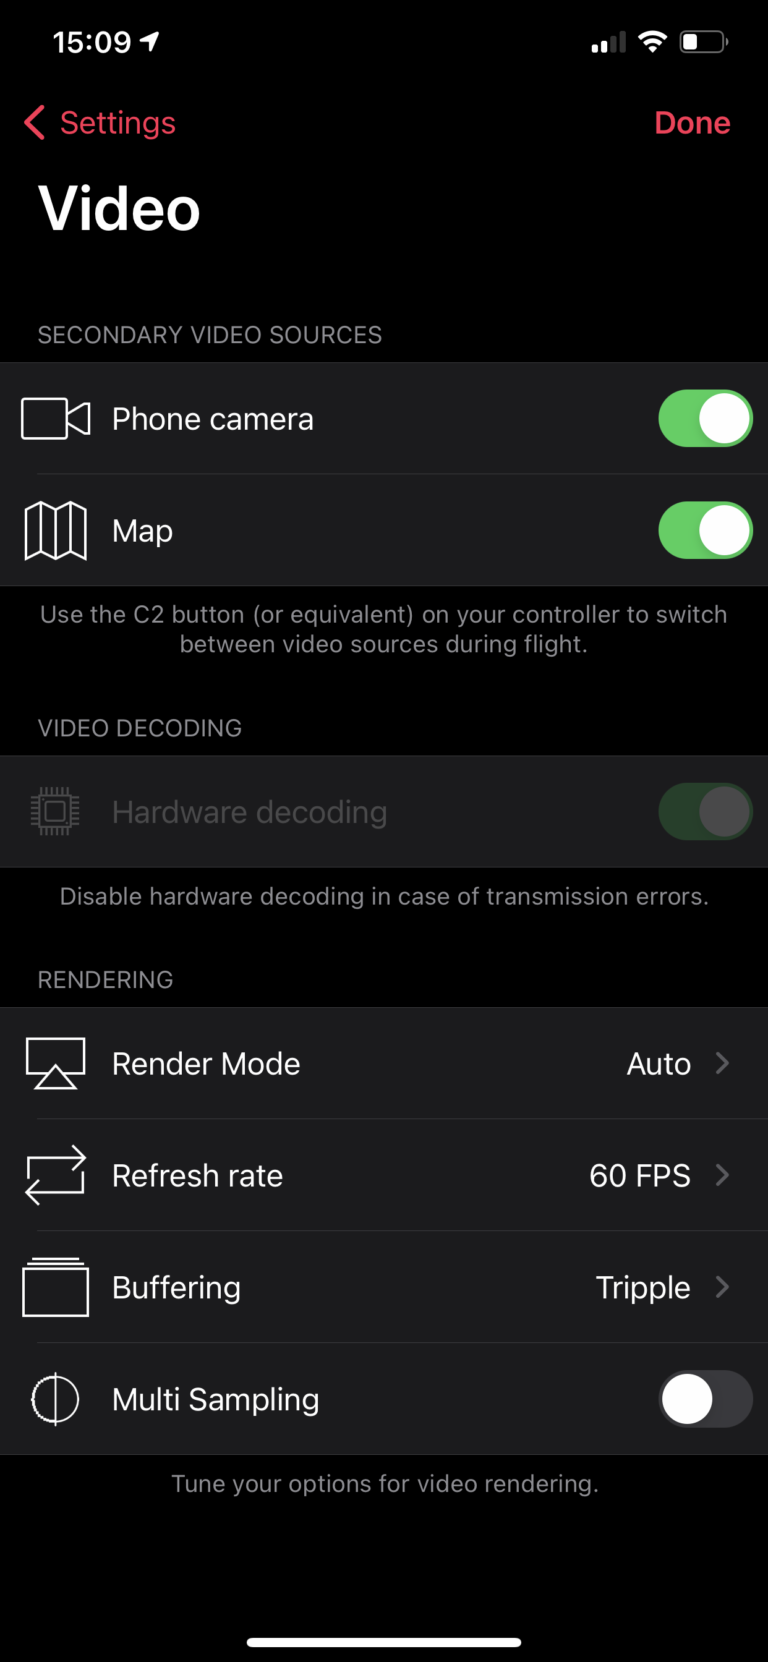
Video Settings
Secondary video sources
If enabled, DroneVR can display not only your drone camera, but also other content such as the phone camera view or a map view in the main view while you are flying. For example you can switch to phone camera view to check what is happening around you without taking off the headset. Or you can check where you and the drone are located on the map. You can switch between the video source with the C2 button on your controller or via the Head-up menu (HUD).
Hardware Decoding
The live drone video can be decoded either in software or by using your phone’s built-in hardware accelerator. Using the hardware accelerator reduces battery consumption, but can result in a less stable video connection than software decoding. We recommend to turn off hardware decoding if you often experience black outs of the live video.
Rendering
Rendering Mode allows you to switch between Mono and Stereo rendering of for the drone video. If you set it to auto, you can flip between both mode by tilting your phone. Auto is very convenient, because when you put on your headset you can automatically switch to stereo mode by moving you head backwards. When you take off your headset you can return back to mono just by tilting your phone without going into settings menu.
Refresh rate determines how often the screen is rendered while flying. You can set it to 30FPS on older phones in case you experience some video stuttering or the phone gets too warm.
Buffering allows you to choose between double and tripple buffering. Double buffering can reduce the display reaction time, but tripple buffering will produce a smoother video display.
Multi Sampling applies additional smoothing to live video to avoid sharp edges. Its experimental and should only be enabled on latest phones. It increases power consumption and device heating.
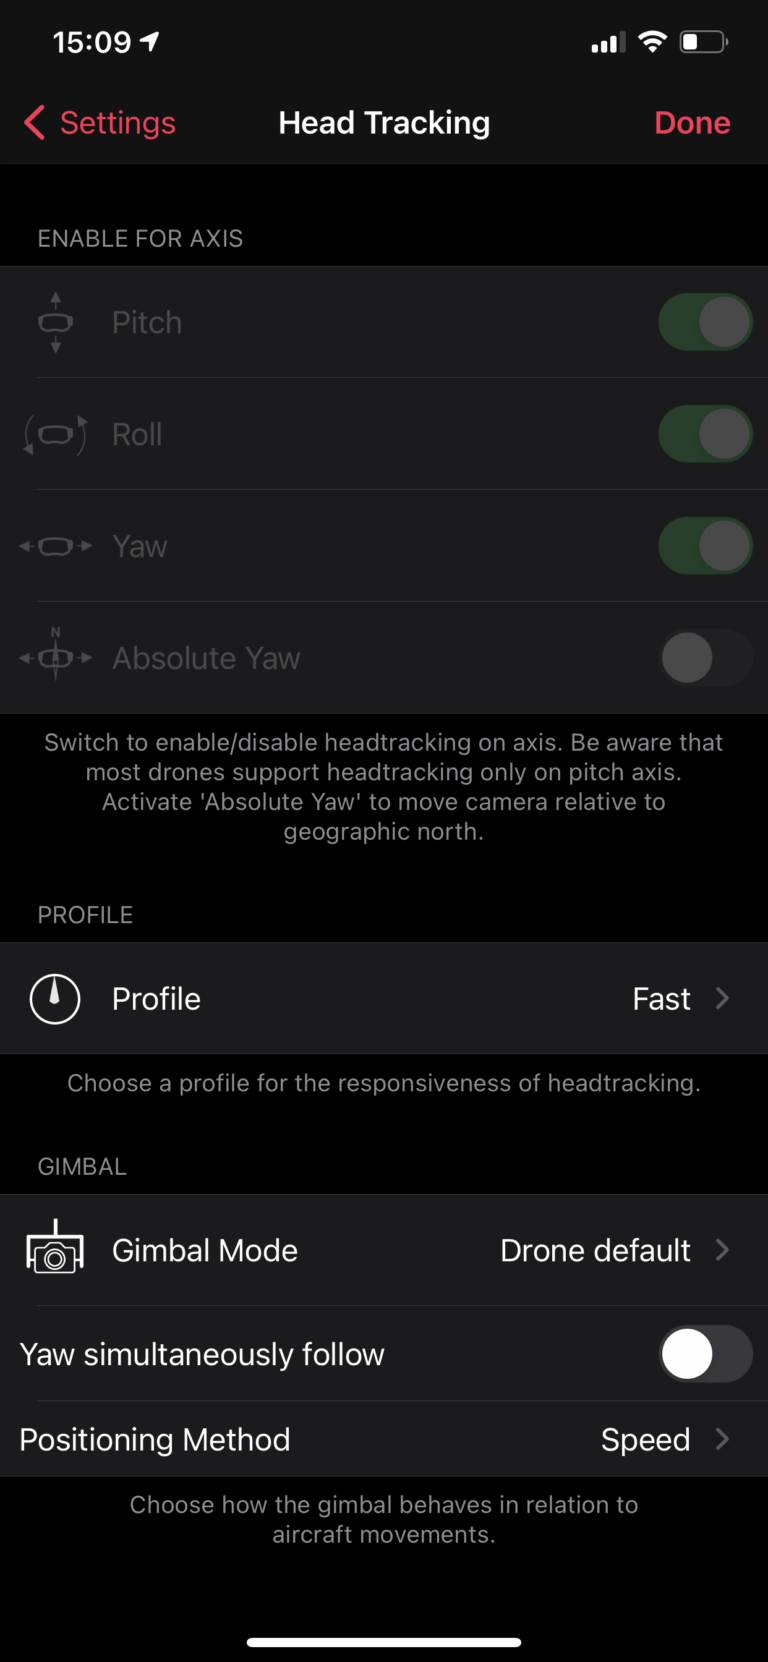
Head Tracking Settings
DroneVR’s head tracking allows you to rotate the drone camera simply by moving your head. This is perfect for recording videos, because you can easily keep your point of interest in the center of the view while flying at the same time.
Axis
You can turn head tracking on/off for each axis separately. Three axis head tracking is currently only supported by the Inspire 1, Mavic 2 and Mavic Air 2. This is a limitation of the drone and not the app.
If you turn “Absolute Yaw” on, the camera will always horizontally point in the direction your head is facing, independent of the drone orientation. If it is off (default), the camera will rotate horizontally with the drone.
Profile
You can choose among three different profiles that determine how rapidly the camera is following you head movements.
- Fast: follows as fast as permitted by the camera gimbal.
- Smooth: delays camera movement a bit compared to your head movements.
- Cinematic: slows down camera movement even more.
Smooth or cinematic are good choices when you are recording video.
Gimbal Mode
Drone Default: keeps whatever gimbal mode your drone has currently configured to (e.g. via the DJI Fly App)
Balanced: always keeps the camera level, independent of the drone roll angle.
FPV: the camera may roll left and right together with the drone. Only supported by some DJI drones.
Yaw simultaneously follow
Makes the camera follow horizontal stick movements more smoothly when turned on. However the camera view may lag a little behind drone movements. Turn on to record smooth video, turn off for speedy flying in FPV mode.
Positioning Method
Allows you to choose between two different camera positioning methods.
Speed: controls the camera rotation speed based on your head movements. This is the default setting and should work best for most users.
Absolute: controls the camera’s absolute rotation angle based on your headset orientation. In this mode, the Mavic 2 and the Mavic Air will rotate the whole drone when the camera gimbal reaches its rotation limit.
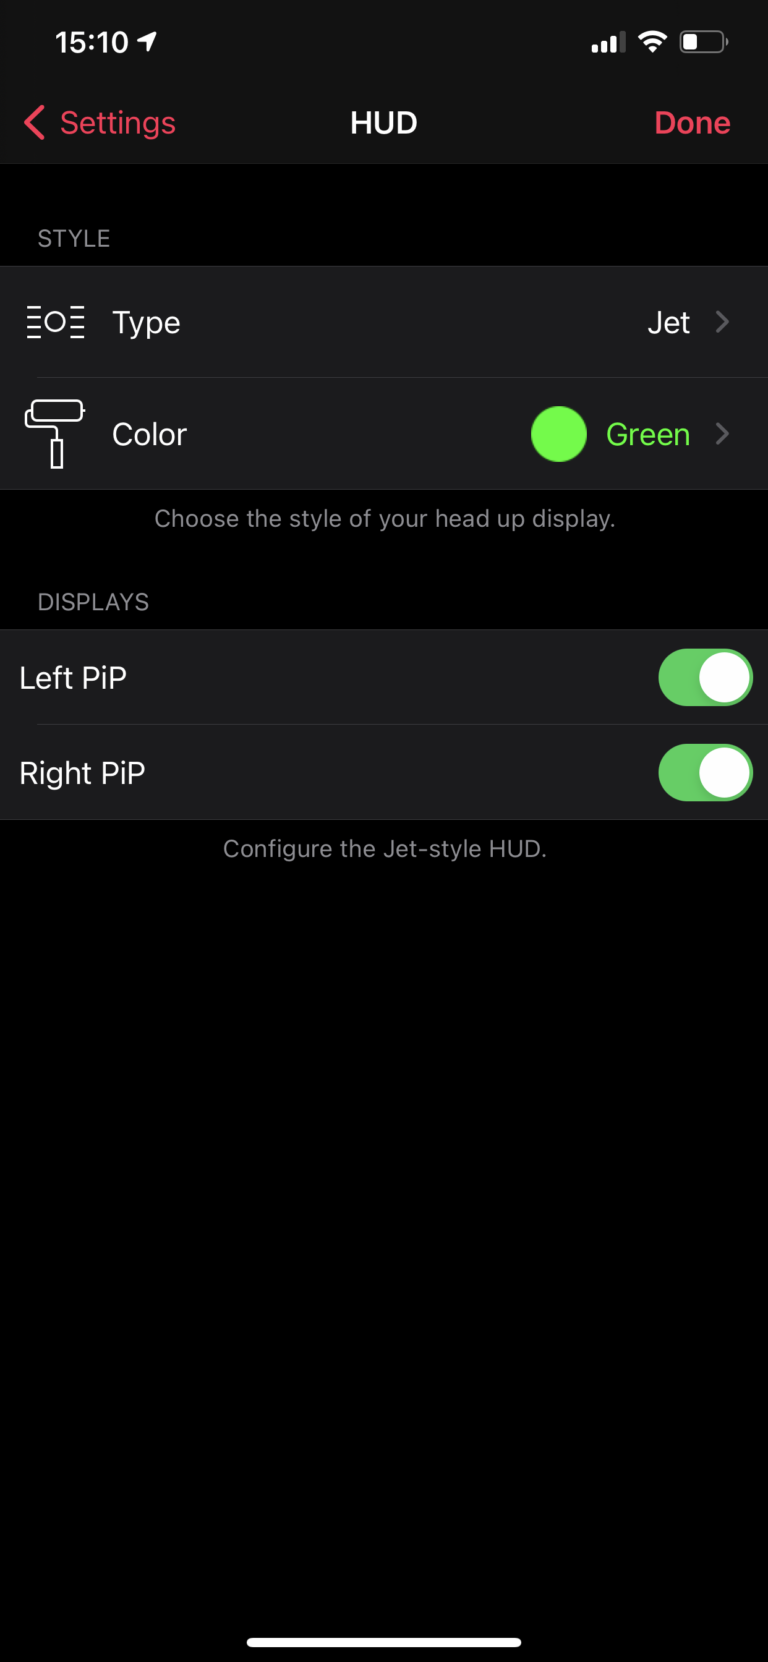
HUD Settings
This screen allows you to configure the appearance of the head-up display.
Type
DroneVR support three different types of head-up display:
- Basic: Shows the most important telemetry data in a compact way.
- Jet: Show telemetry data styles like a jet fighter head-up display with altitude/speed ladders.
- None: Turns off all telemetry data to show only the drone video.
Color
Allows you to choose between green, red and cyan color for the head-up display. Changing the hud color may make the text better readable, depending on the environment your are flying in.
Displays
Allows you to turn on/off the two small picture-in-picture (PiP) displays shown on the bottom left and right corner of the head-up display.
The left PiP will show either the mini-map or the drone video (in case your main view shows the map)
The right PiP will show either the phone camera or the drone video (in case your main view shows the phone camera)
Jet HUD explained
The picture below shows the Jet head-up display:
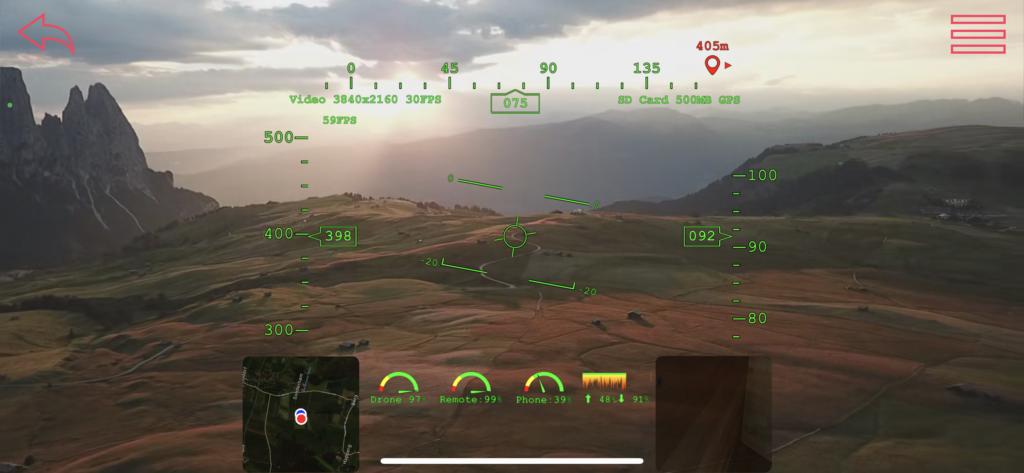
It contains the following indicators:
Compass: is located at the top of the screen and shows the current heading for the drone. When the drone recorded a home point (DJI drones do this automatically at take off) the red placemark indicator shows your current distance and direction to the home point.
Camera Info: The left text below the compass shows the current camera mode and resolution. When you are recording video, it shows the recording duration.
Storage and flight mode info: The right text below the compass shows the selected storage and remaining capacity for recordings. In addition, the drone’s current flight mode (such as GPS, Speed, ATTI) is shown if available.
Airspeed: is shown by the right ladder and text box.
Altitude: is shown by the left ladder and text box.
Drone pitch and roll: is indicated by the ladder in the middle of the HUD.
Camera roll and yaw: is indicated by the small circle in the middle of the HUD. The top and bottom line show the yaw rotation relative to the drone. When both are pointing straight up/down, the camera is facing exactly forward. The left and right lines show the camera roll relative to the horizon. When both are level, the camera is level as well.
Batteries status: is indicated by the three small gauges at the bottom of the screen. The first gauge shows the drone battery status, the second one shows the remote controller battery status and the third one shows your phone battery status.
Signal strength: is indicated by the moving heatmap right to the battery indicators. It shows the current signal strength for the connection between the drone and remote controller. Normally it should show 100% in uplink (controller to drone) and downlink (drone to controller). If it drops below 100% you might be too far away or the signal is disturbed by other reasons.
Left Picture-in-Picture display: shows the mini map (if enabled). The blue dot indicates the current drone position, the red dot shows the homepoint.
Right Picture-in-Picture display: shows the phone camera so that you can see what’s happening around you.
Basic HUD explained
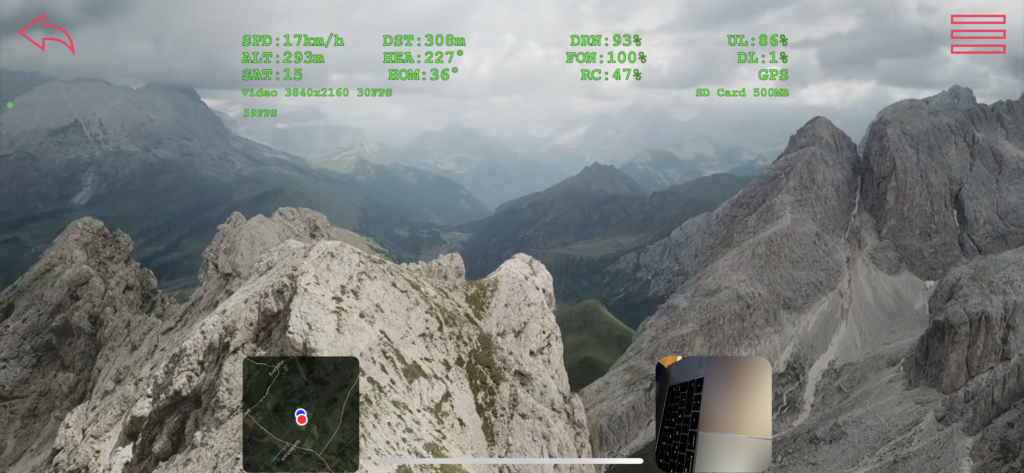
SPD (Speed): Shows the current airspeed.
ALT (Altitude): Shows the current altitude above starting point.
SAT (Satellites): Shows the number of connected GPS satellites.
DST (Distance): Shows the distance to the home point.
HEA (Heading): Shows the current heading of the drone.
HOM (Home point): Shows the direction to the home point. Align with heading to fly home.
DRN (Drone battery): Shows the remaining drone battery in percent.
FON (Phone battery): Shows the remaining phone battery in percent.
RC (Remote controller): Shows the remaining remote controller battery in percent.
UL (Uplink): Shows the signal strength from controller to drone.
DL (Downlink): Shows the signal strength from drone to controller.
GPS: Show the drone’s current flight mode.